Get creative and crafty with these 18 innovative paper mache recipes that will take your DIY skills to the next level! From classic flour and water paste to glue-based, quick-drying, and eco-friendly options, we’ve got you covered. Whether you’re a seasoned crafter or just starting out, our selection of paper mache recipes is sure to inspire you to create stunning crafts.
From decorative bowls and ornaments to animal masks and pinatas, the possibilities are endless with these versatile and easy-to-make paper mache creations. So grab some paper, glue, and imagination, and let’s dive into the wonderful world of paper mache!
Classic Flour and Water Paper Mache Paste
This recipe makes a simple yet effective paper mache paste using flour and water, ideal for creating decorative objects or repairing furniture. With just two ingredients, you can achieve a durable and long-lasting bond between your paper strips.
Ingredients:
– 2 tablespoons all-purpose flour
– 1 tablespoon warm water
Instructions:
1. In a small bowl, mix together the flour and water until smooth and free of lumps.
2. Stir until the paste reaches your desired consistency. It should be thick enough to hold its shape but still spreadable.
3. Use immediately or store in an airtight container for up to 24 hours.
Cooking Time: None
Glue-Based Paper Mache for Stronger Creations

Get ready to create sturdy and durable paper mache art with this simple recipe!
Ingredients:
– 2 cups water
– 1 cup white glue (PVA-based)
– 1/2 cup paper strips (newspaper, printer paper, or cardboard)
– Optional: decorative materials like glitter, paint, or stickers
Instructions:
1. Mix the water and glue in a bowl until smooth.
2. Tear the paper into strips, about 1-2 inches wide.
3. Dip each strip into the glue mixture, coating both sides evenly.
4. Wrap the glued paper strip around your base shape (e.g., balloon, wire armature) or surface, overlapping the edges as you go.
5. Continue adding layers of paper and glue until you reach the desired thickness.
6. Allow the creation to dry completely, either air-drying or using a fan on low setting (about 2-3 hours).
7. Once dry, you can paint, decorate, or add additional details.
Cooking Time: None! This recipe is for crafting, not cooking.
Quick-Drying Paper Mache with Wallpaper Paste

Create strong and durable paper mache projects quickly with this easy-to-make recipe using wallpaper paste.
Ingredients:
• 2 cups water
• 1 cup wallpaper paste
• 1 tablespoon white glue
• 4-6 sheets of newspaper or paper pulp
• Scissors
• A mold or shape to create your project
Instructions:
1. Mix the wallpaper paste and water in a bowl until smooth.
2. Add the white glue and stir well.
3. Tear the newspaper into strips, approximately 1 inch wide.
4. Dip each strip into the mixture, coating both sides evenly.
5. Place the coated strips onto your mold or shape, overlapping them slightly as you go.
6. Allow the mixture to dry completely, which should take around 30 minutes to an hour depending on the humidity.
7. Once dry, trim any excess paper and your project is ready.
Cooking Time: None, this recipe is for a craft project!
Lightweight Paper Mache Using Toilet Paper
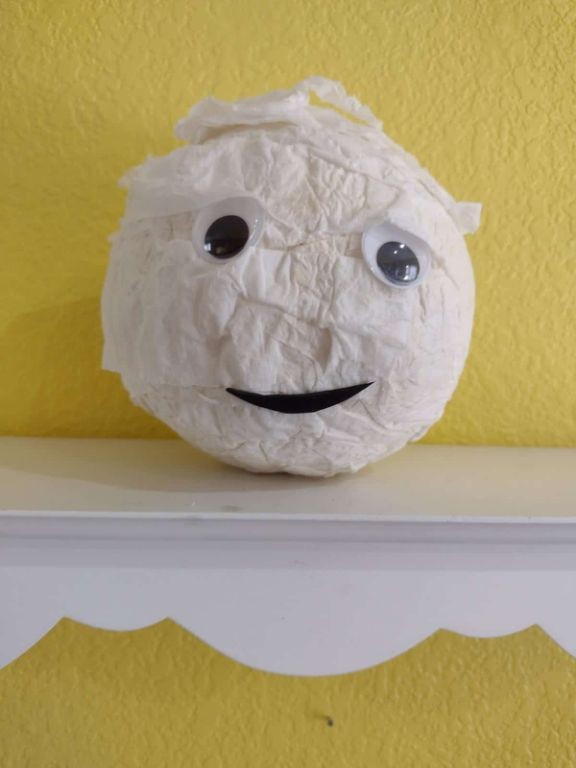
Create a unique and eco-friendly paper mache project with this simple recipe that uses toilet paper as the primary material.
Ingredients:
– 1 roll of toilet paper
– 2 tablespoons of white glue
– 1 tablespoon of water
– Optional: food coloring, fabric scraps, or other embellishments
Instructions:
1. Unroll the toilet paper and cut it into strips about 1-2 inches wide.
2. In a bowl, mix together the glue and water until well combined.
3. Dip each toilet paper strip into the glue mixture, coating both sides evenly.
4. Wrap the coated toilet paper strip around your project or shape (e.g., a sculpture, vase, or decorative box).
5. Continue wrapping layers of strips until you achieve the desired thickness.
6. Allow the paper mache to dry completely, which may take several hours or overnight.
Cooking Time: None, as this is a craft project!
Eco-Friendly Recycled Newspaper Paper Mache

Transforming recycled newspaper into a sustainable paper mache material is an innovative way to reduce waste and create unique art pieces. With just a few simple ingredients, you can create a natural adhesive that’s perfect for crafts and DIY projects.
Ingredients:
– 2 cups of shredded recycled newspaper
– 1 cup of warm water
– 1 tablespoon of white glue (eco-friendly option)
– 1 teaspoon of glycerin (optional)
Instructions:
1. Tear the newspaper into small pieces and soak them in the warm water for at least an hour.
2. Mix the soaked newspaper with the white glue until a pulp forms.
3. Add the glycerin, if using, to help reduce shrinkage and improve durability.
4. Stir well to combine all ingredients.
5. Apply the paper mache mixture to your desired surface or project, allowing each layer to dry before adding more.
6. Let it dry completely (about 24 hours).
Cooking Time: None needed! Just let it air-dry.
Extra-Strong Paper Mache with Fabric Stiffener
Create a durable paper mache mixture infused with fabric stiffener for long-lasting and robust projects.
Ingredients:
– 2 cups water
– 1/2 cup white glue (PVA)
– 1/4 cup fabric stiffener (available at craft stores)
– 2 tablespoons glycerin
– 2 cups torn paper strips or pulp
Instructions:
1. Mix the water, glue, and fabric stiffener in a large bowl until well combined.
2. Add the glycerin and stir to dissolve.
3. Tear the paper into strips or soak the pulp in water for about 10 minutes to create fibers.
4. Soak the paper strips or pulp fibers in the mixture for at least 30 minutes, or overnight for better results.
5. Apply the paper mache mixture to a surface or object, allowing each layer to dry before adding more.
6. Repeat the process until you achieve the desired thickness.
Cooking Time: None needed! This recipe is ready when the mixture reaches the desired consistency.
Cornstarch Paper Mache for Smooth Finishes
Achieve a smooth finish on your paper mache creations using this simple recipe that combines the effectiveness of cornstarch and water. This technique is ideal for creating decorative objects, sculptures, or even furniture.
Ingredients:
– 2 tablespoons cornstarch
– 1 cup warm water
– 1 tablespoon white glue (optional)
– Paper strips or pulp
Instructions:
1. In a small bowl, mix the cornstarch and warm water until smooth and free of lumps.
2. If desired, add the white glue to the mixture and stir well.
3. Tear paper strips into desired lengths for your project.
4. Dip each strip into the cornstarch mixture, coating both sides evenly.
5. Apply the coated paper strips to your surface, overlapping them slightly as you go.
6. Allow the layers to dry completely before sanding or adding additional coats.
Cooking Time: None required. Let the mixture sit at room temperature for 30 minutes to thicken before use.
Paper Mache Clay for Detailed Sculpting
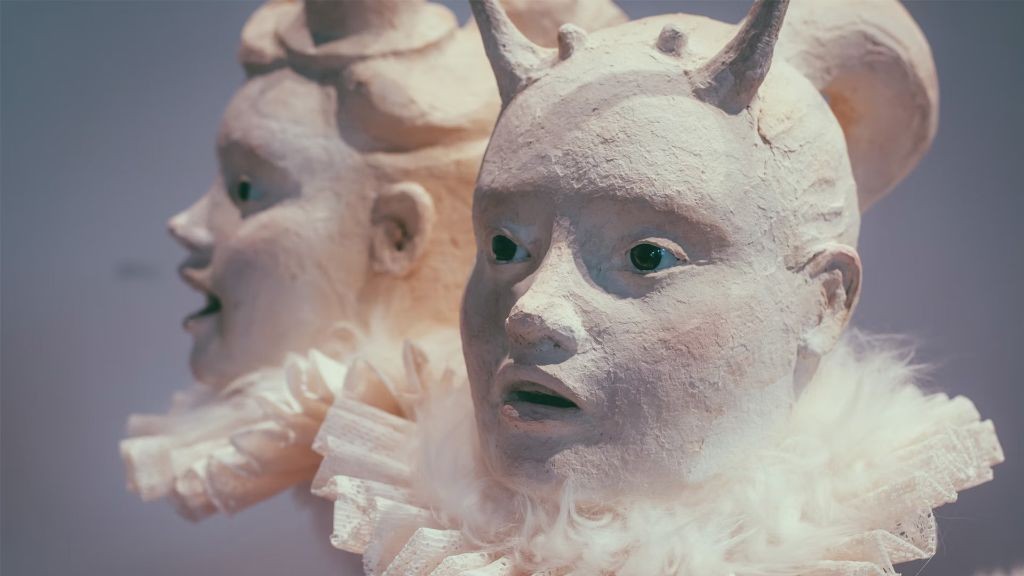
Paper Mache Clay Recipe for Detailed Sculpting
Get creative with this versatile paper mache clay recipe, perfect for detailed sculpting and crafting unique art pieces.
Ingredients:
– 2 cups water
– 1 cup white glue (PVA)
– 1/2 cup watercolor paint (optional, for color tint)
– 1 tablespoon glycerin
– 1 teaspoon borax
Instructions:
1. In a large bowl, mix together the water and white glue until well combined.
2. If desired, add a few drops of watercolor paint to tint the clay. Mix well.
3. Add the glycerin and borax to the mixture. Stir until dissolved.
4. Knead the mixture with your hands until it forms a smooth, pliable dough (about 5-7 minutes).
5. Use as needed for detailed sculpting or crafting.
Cooking Time: None required! This paper mache clay is ready to use immediately.
Paper Mache Pinata with Colorful Tissue Layers
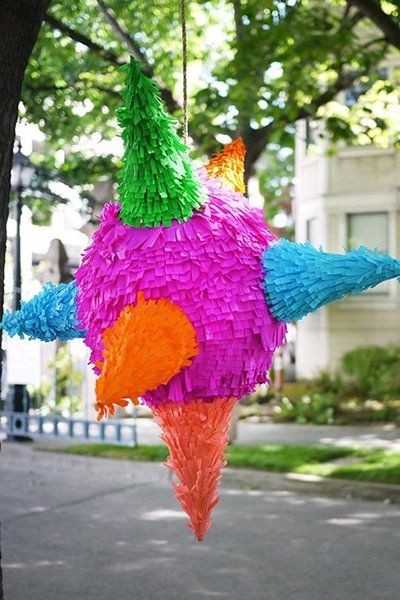
Get ready to unleash a burst of fun and creativity! With this simple recipe, you’ll create a vibrant piñata filled with colorful tissue layers that will delight kids and adults alike.
Ingredients:
– Newspaper or paper strips
– Flour and water mixture (paper mache paste)
– Colorful tissue paper (various colors and patterns)
– Scissors
– Balloons (various sizes)
– String or twine
– Decorative items (optional)
Step-by-Step Instructions:
1. Mix the flour and water to create the paper mache paste.
2. Blow up a balloon to the desired size for your piñata.
3. Apply layers of newspaper strips, alternating with thin coats of the paper mache paste.
4. Once the paper mache layer is dry, cut colorful tissue paper into strips or shapes.
5. Wrap each strip or shape around the piñata, overlapping them slightly to create a layered effect.
6. Continue applying layers until you reach the desired thickness and color.
7. Tie off the opening with string or twine.
8. Allow the piñata to dry completely before filling it with treats.
Cooking Time: None! This recipe is a fun DIY project that doesn’t require cooking.
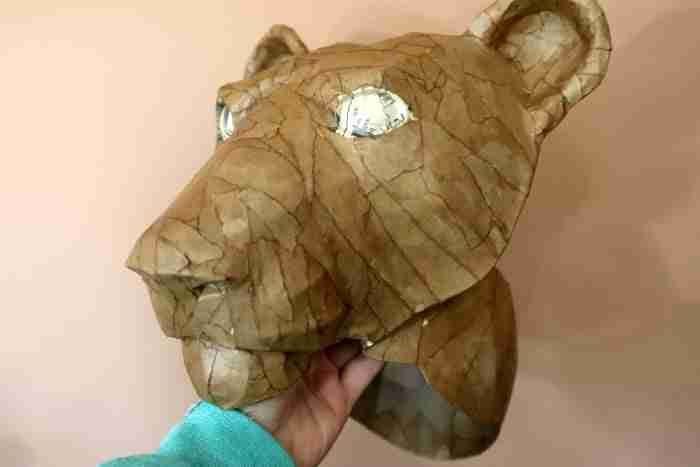
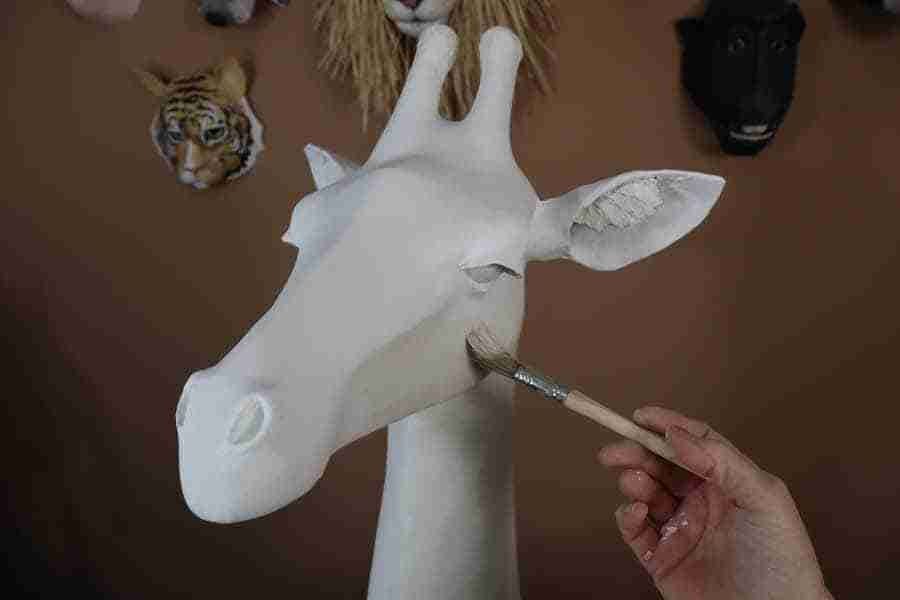
Paper Mache Animal Masks for Kids
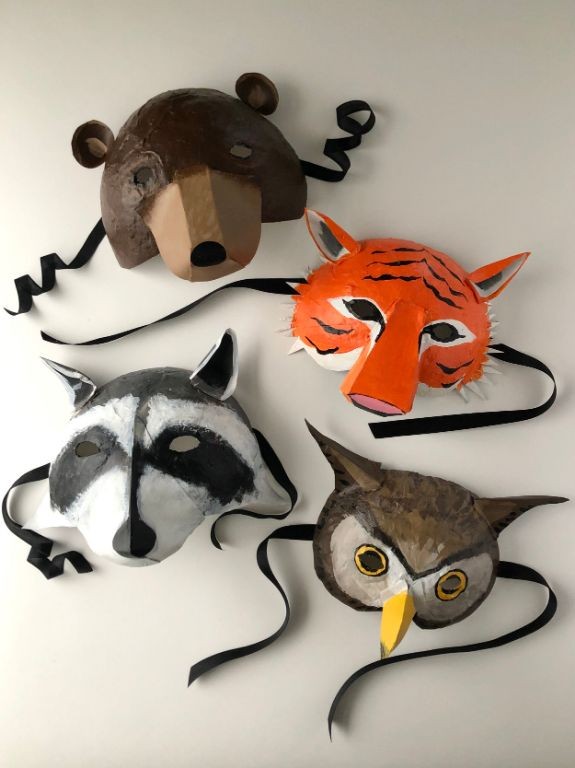
Transform ordinary paper mache into extraordinary animal masks with this fun and easy recipe!
Ingredients:
– 2 cups water
– 1 cup all-purpose flour
– 1/2 cup white glue
– Scissors
– A balloon or paper plate (for the mask shape)
– Paper strips (construction paper or newspaper work well)
– Glue brush
– Optional: paint, markers, glitter, and other embellishments
Instructions:
1. Mix 2 cups of water with 1/2 cup of flour to create a smooth paste.
2. Add 1/2 cup of white glue to the mixture and stir until combined.
3. Blow up a balloon or cut out a circle from a paper plate to use as the mask shape.
4. Cut strips of paper, about 1 inch wide.
5. Dip each strip into the paper mache mixture, coating both sides evenly.
6. Wrap the coated strips around the balloon or paper plate, overlapping them slightly to create a sturdy base.
7. Allow the mask to dry completely (this may take several hours).
8. Once dry, pop the balloon or remove the paper plate to reveal your animal mask!
9. Use glue and embellishments to add features like eyes, noses, and mouths.
Cooking Time: None needed! Just let it dry and you’re ready to wear your new animal mask!
Paper Mache Bowls with Decoupage Designs
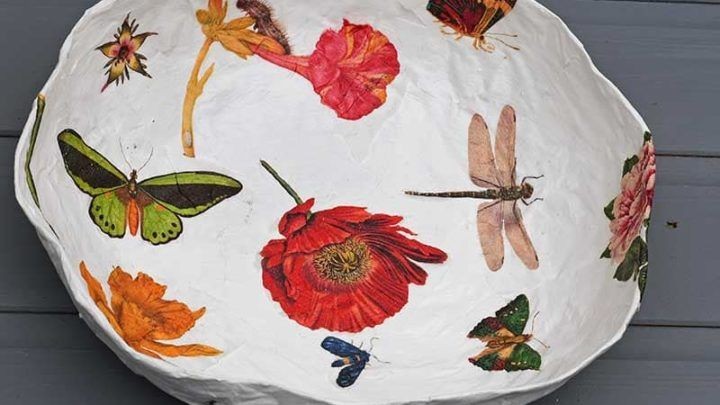
Create unique and eco-friendly bowls using paper mache techniques and decoupage designs. This recipe is perfect for crafty individuals looking to create one-of-a-kind decorative pieces.
Ingredients:
– 2 cups of water
– 1 cup of white glue
– 4 cups of shredded newspaper or cardboard
– Decorative papers or magazines (for decoupage)
– Acrylic paint and varnish (optional)
Instructions:
1. In a large bowl, mix together the water and white glue until well combined.
2. Add the shredded newspaper or cardboard to the mixture and stir until it forms a pulp.
3. Shape the pulp into bowls using your hands or molds. Let them dry completely (at least 24 hours).
4. Once dry, paint the bowls with acrylic paint and varnish for a protective coating (optional).
5. Cut out decorative designs from magazines or papers and apply them to the bowl using a decoupage medium.
6. Seal the design with another layer of decoupage medium and let it dry completely.
Cooking Time: None
Paper Mache Planets for a Solar System Project
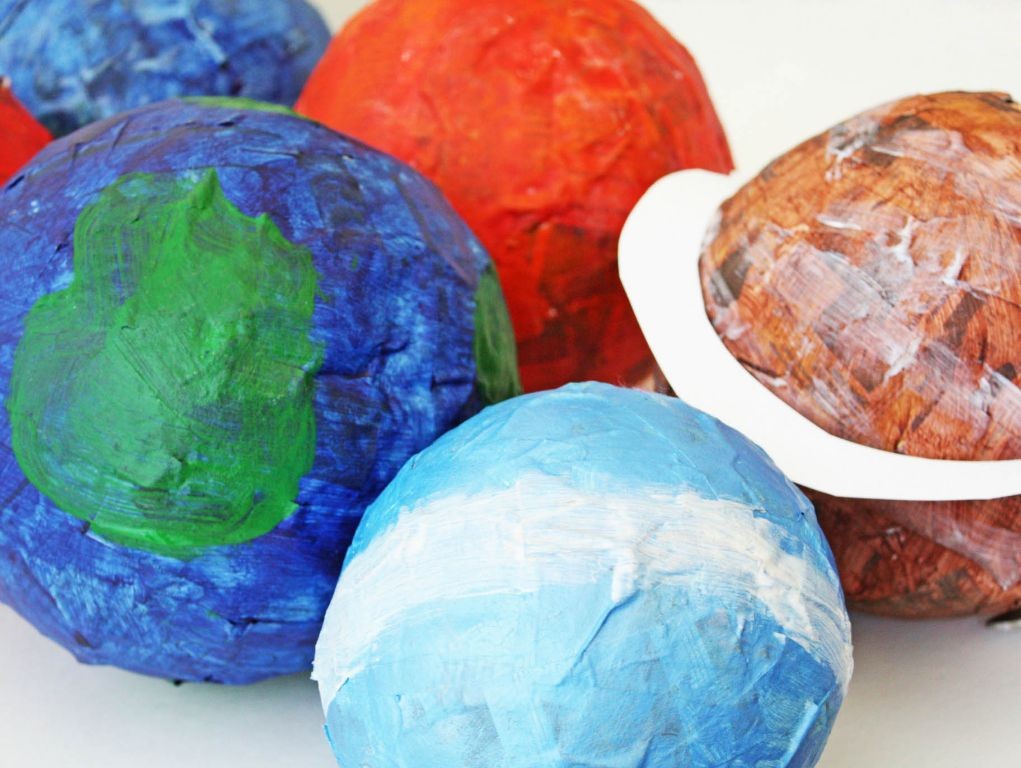
Transform ordinary materials into an out-of-this-world solar system! This recipe guides you through the process of creating paper mache planets that are perfect for your next astronomy project.
Ingredients:
– Newspaper or paper strips
– Water
– White glue (PVA)
– Scissors
– Paint and paintbrushes (optional)
– String or twine
Instructions:
1. Tear newspaper into small strips, about 1-2 inches wide.
2. Mix equal parts water and white glue in a bowl until well combined.
3. Dip each paper strip into the mixture, coating both sides evenly.
4. Wrap the coated paper strip around a Styrofoam ball or a paper cone to create the planet shape.
5. Allow the first layer to dry completely before adding additional layers.
6. Paint and decorate your planets as desired.
7. Use string or twine to attach the planets to a cardboard base or a mobile to create a solar system display.
Cooking Time: None! This recipe is a craft project, not a culinary one.
Paper Mache Volcano with Baking Soda Lava
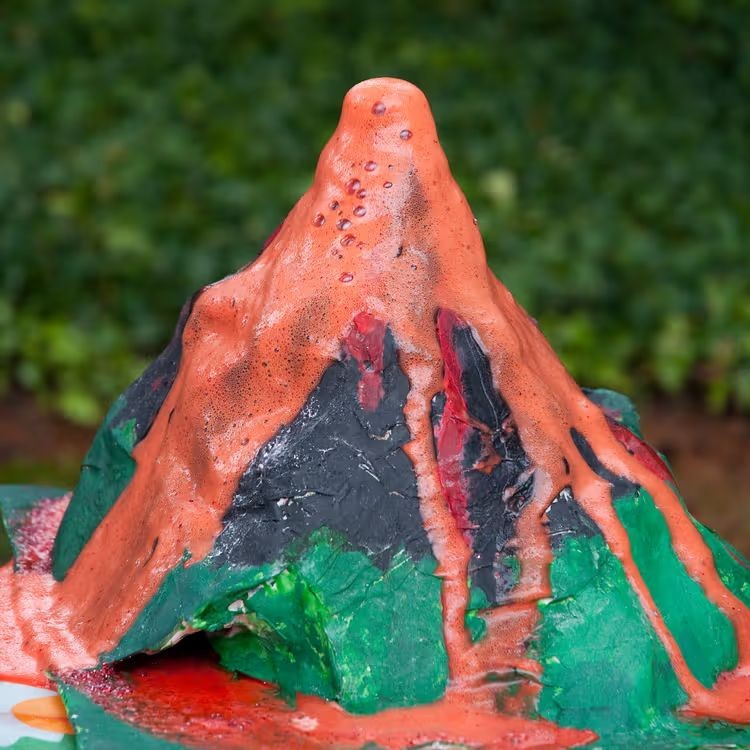
Create a realistic volcano using paper mache and baking soda lava that will erupt in a thrilling display of chemistry in action!
Ingredients:
– 2 cups flour
– 1 cup water
– 1/2 cup white glue
– 1 tablespoon vinegar
– 3 tablespoons baking soda
– Food coloring (optional)
– Cardboard or paper mache cone for the volcano shape
Instructions:
1. Mix together flour, water, and glue to create a paper mache mixture.
2. Apply layers of the mixture to the cardboard or paper mache cone, allowing each layer to dry before adding the next.
3. Once the final layer is dry, use vinegar to trigger the eruption by mixing 1 tablespoon of baking soda with 2 tablespoons of warm water and adding it to the volcano’s mouth.
4. Observe as the “lava” flows out of the volcano!
Cooking Time: None required – just assemble and enjoy the show!
Paper Mache Fairy Houses with Moss Accents
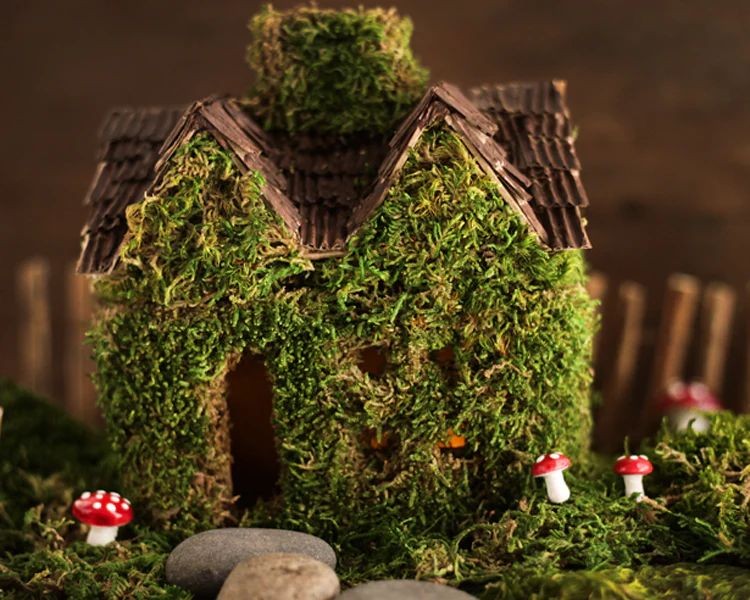
Create enchanting miniature houses that will transport you to a world of fantasy and wonder. This recipe combines the art of paper mache with the magic of moss accents, resulting in an adorable fairy abode that’s perfect for decorating or gifting.
Ingredients:
– 2 cups water
– 1 cup flour
– 1/2 teaspoon white glue
– 1/4 teaspoon salt
– Paper strips (various colors)
– Moss
– Twine or string
– Small rocks or pebbles (optional)
Instructions:
1. In a bowl, mix together water, flour, glue, and salt until smooth.
2. Cut paper strips into desired shapes for the house’s walls, roof, and details.
3. Soak the paper strips in the mixture for about 10 minutes.
4. Shape the paper strips into the desired forms and let them dry completely (may take several hours or overnight).
5. Assemble the paper mache pieces to form the fairy house structure.
6. Use twine or string to secure the roof and any additional details.
7. Plant moss around the base of the house, tucking in small rocks or pebbles if desired.
Cooking Time: None required!
Enjoy your whimsical paper mache fairy houses with moss accents!
Paper Mache Hot Air Balloon Decorations
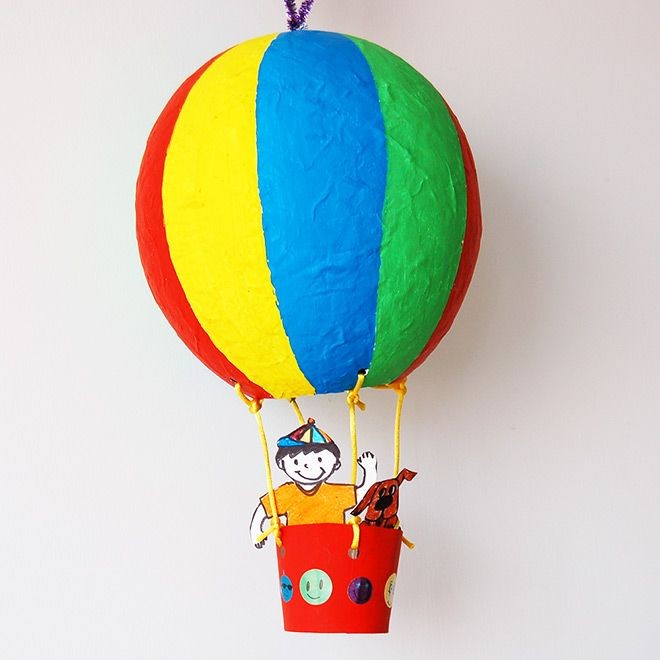
Add a touch of whimsy to your party or event with these adorable paper mache hot air balloon decorations! With just a few simple ingredients and some creative crafting, you can create unique and eye-catching centerpieces.
Ingredients:
– 2 cups water
– 1 cup white glue
– 1/2 cup torn newspaper strips
– Balloon template or shape (you can use a paper plate or a hot air balloon printout)
– Scissors
– Paint and decorations (optional)
Instructions:
1. Mix the water and glue in a bowl until smooth.
2. Tear the newspaper into small strips and add to the mixture, stirring well.
3. Cut out the balloon shape from cardboard or use the plate/shape template.
4. Dip a strip of newspaper into the mixture and wrap around the balloon shape, overlapping the edges as you go.
5. Continue wrapping until the entire balloon is covered with 2-3 layers of paper mache.
6. Allow the decoration to dry completely (this may take several hours or overnight).
7. If desired, paint or decorate the balloon with markers or other embellishments.
Cooking Time: None! This project requires no cooking time, just patience and creativity.
Paper Mache Easter Eggs with Pastel Colors
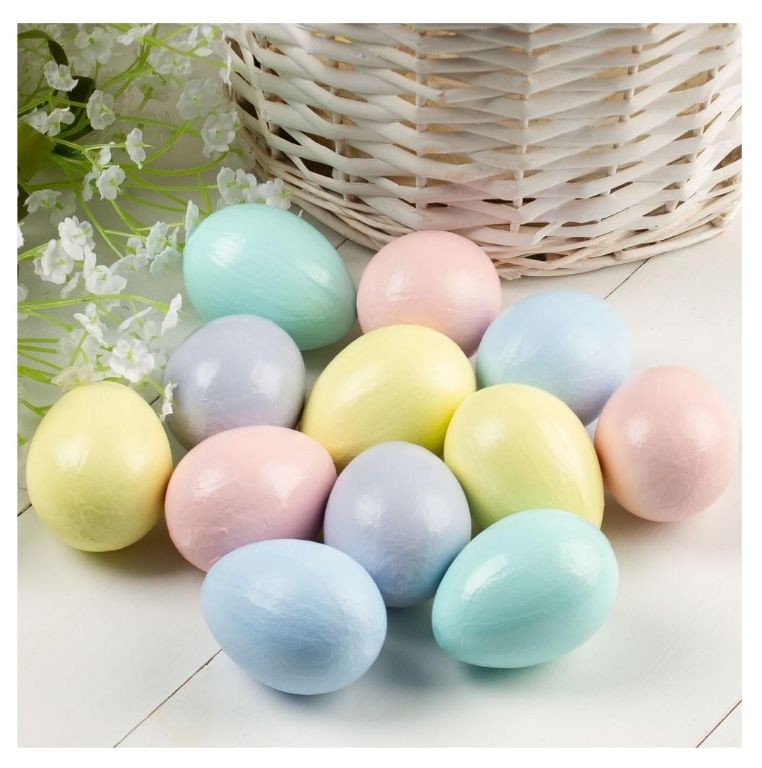
Transform plain eggs into adorable masterpieces using paper mache and pastel colors. This fun and creative project is perfect for kids and adults alike to get into the Easter spirit.
Ingredients:
– 1-2 hard-boiled eggs per person
– Newspaper strips or tissue paper
– White glue (PVA)
– Water
– Pastel-colored paint (pink, blue, yellow, green)
– A surface to work on
– Optional: decorative items like glitter, stickers, or ribbons
Instructions:
1. Cut newspaper strips into 1-inch wide pieces.
2. In a bowl, mix equal parts white glue and water until smooth.
3. Soak the newspaper strips in the mixture for about 30 seconds.
4. Wrap each egg with 2-3 layers of the paper strips, overlapping as you go.
5. Allow the eggs to dry completely (takes about an hour).
6. Once dry, paint the eggs with pastel colors using soft brushstrokes.
7. Add decorative items if desired.
8. Let the paint dry before handling.
Cooking Time: None! These are a craft project, not a culinary one.
Get creative and enjoy your beautiful paper mache Easter eggs!
Paper Mache Halloween Decorations
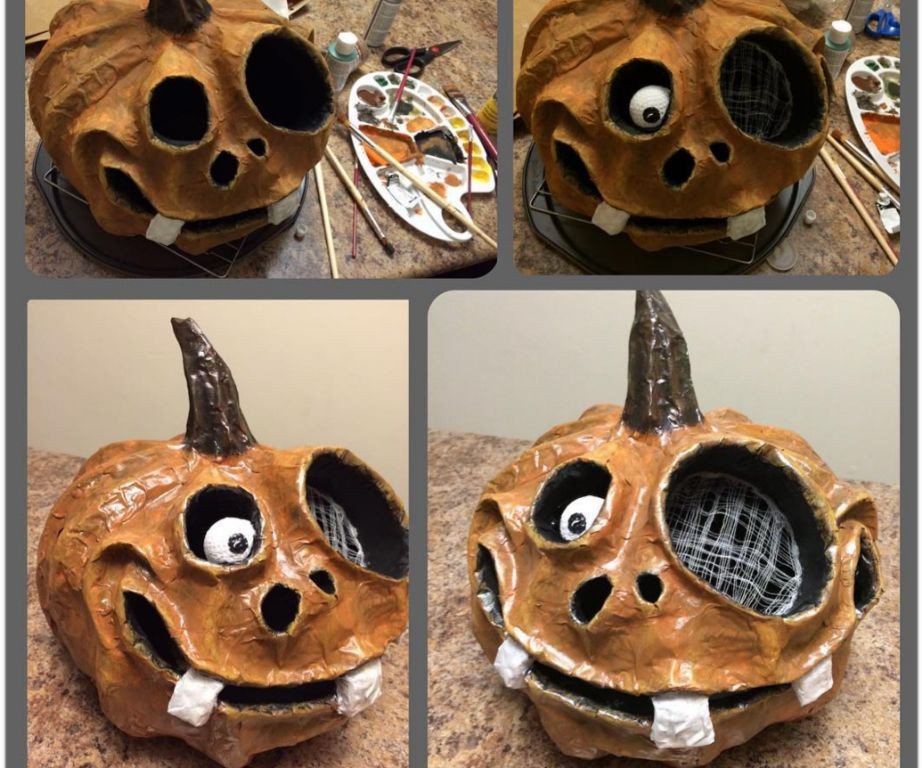
Create spooky and fun decorations for your Halloween party with this simple paper mache recipe. With just a few ingredients, you can create unique and eerie decorations that will impress your guests.
Ingredients:
– 2 cups of flour
– 1/2 cup of water
– 1 tablespoon of white glue
– 1/4 teaspoon of salt
– Newspaper or paper strips for shaping
– Scissors
– Paint and decorations (optional)
Instructions:
1. In a large bowl, mix together the flour, water, white glue, and salt until smooth.
2. Tear newspaper into strips and soak them in the mixture for about 10 minutes.
3. Shape the mixture-covered paper strips into desired shapes, such as bats, ghosts, or jack-o’-lanterns.
4. Let the shapes dry completely, which may take several hours or overnight.
5. Once dry, paint and decorate your creations with Halloween-themed colors and designs (optional).
6. Allow the decorations to fully dry before displaying.
Cooking Time: None, as this is a non-cooking recipe!
Paper Mache Christmas Ornaments
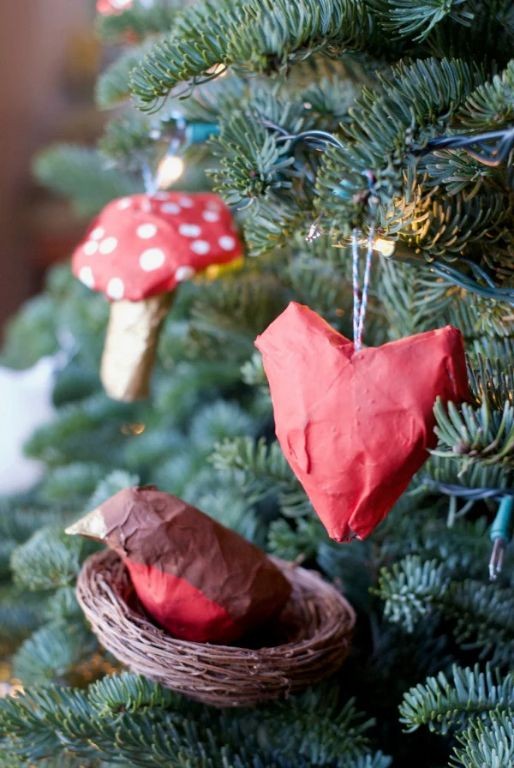
Create Unique Paper Mache Christmas Ornaments
Make this holiday season a little more special with these adorable paper mache ornaments. With just a few simple ingredients and some creative flair, you’ll have a unique and personalized decoration for your tree or gift-giving.
Ingredients:
– 2 cups water
– 1 cup white glue
– 1 tablespoon borax
– Paper strips (colored construction paper or newspaper)
– Scissors
– Paint and decorations (optional)
Instructions:
1. In a bowl, mix together the water and white glue until well combined.
2. Add the borax to the mixture and stir until dissolved.
3. Cut the paper into long strips, about 1 inch wide.
4. Dip each strip into the paper mache mixture, coating both sides evenly.
5. Wrap the coated strips around a Styrofoam ball or a cardboard shape, overlapping the strips as you go.
6. Allow the ornament to dry completely, either air-drying it for several hours or using a fan to speed up the process.
7. Once dry, paint and decorate your ornament with markers, glitter, or other embellishments.
Cooking Time: None! This is a craft project, not a recipe.
Summary
Get creative with these 18 innovative paper mache recipes! From classic flour and water paste to eco-friendly recycled newspaper, discover unique techniques for stunning crafts. Learn how to make extra-strong creations with fabric stiffener, lightweight bowls with decoupage designs, and even a solar system project with paper mache planets. Create fun and colorful projects like Halloween decorations, Easter eggs, and Christmas ornaments. Whether you’re a crafty kid or an artistic adult, these recipes will inspire you to unleash your creativity and make something truly special.