Are you a fan of comforting, hearty dishes that bring people together? Look no further than these 20 creamy pierogi casserole recipes. Pierogies are a staple in many Eastern European cuisines, and when baked into a casserole with rich, creamy sauces and an assortment of fillings, they become an irresistible treat for comfort food lovers.
From classic potato and onion to more adventurous combinations like buffalo chicken and sauerkraut, these pierogi casseroles are sure to satisfy your cravings. Whether you’re looking for a quick weeknight dinner or a show-stopping main course for special occasions, we’ve got you covered. In this article, we’ll dive into the world of creamy pierogi casserole recipes and explore the endless possibilities.
Cheesy Potato and Onion Pierogi Casserole
A hearty and comforting casserole that combines the flavors of potatoes, onions, and cheese with the convenience of pierogies.
Ingredients:
– 1 package of frozen potato and onion pierogies (about 20-25 pieces)
– 1 large onion, diced
– 2 cloves of garlic, minced
– 1 cup of shredded cheddar cheese
– 1/2 cup of grated Parmesan cheese
– 1/4 cup of butter, melted
– Salt and pepper to taste
Instructions:
1. Preheat oven to 375°F (190°C).
2. Cook pierogies according to package instructions and set aside.
3. In a large skillet, sauté diced onion and minced garlic until softened.
4. In a separate mixing bowl, combine melted butter, shredded cheddar cheese, and grated Parmesan cheese. Mix well.
5. In a 9×13 inch baking dish, arrange half of the cooked pierogies in the bottom. Top with half of the cheese mixture, followed by half of the sautéed onion mixture.
6. Repeat the layers, starting with the remaining pierogies, then the remaining cheese mixture, and finally the remaining onion mixture.
7. Cover the dish with aluminum foil and bake for 30 minutes. Remove foil and continue baking for an additional 10-15 minutes, or until golden brown.
Cooking Time: 40-45 minutes
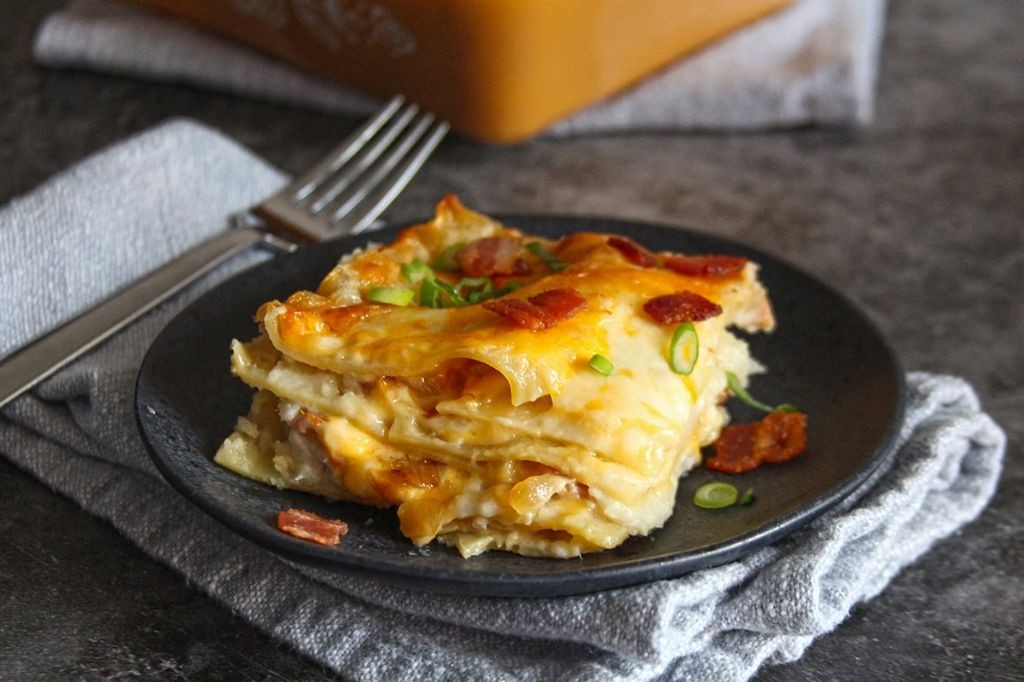
Bacon and Cheddar Pierogi Bake
This recipe combines the classic Polish dish of pierogi with the richness of bacon and cheddar cheese, perfect for a cozy night in. This hearty bake is easy to prepare and serves as a satisfying meal or snack.
Ingredients:
– 1 package of pierogi (cheese-filled or potato-filled)
– 6 slices of cooked bacon, crumbled
– 1 cup of shredded cheddar cheese
– 1/2 cup of grated mozzarella cheese
– 1 tablespoon olive oil
– Salt and pepper to taste
Instructions:
1. Preheat oven to 375°F (190°C).
2. Place pierogi on a baking sheet lined with parchment paper.
3. Drizzle with olive oil and sprinkle crumbled bacon, shredded cheddar cheese, and grated mozzarella cheese evenly over the pierogi.
4. Bake for 20-25 minutes or until the cheese is melted and bubbly.
5. Serve hot and enjoy!
Cooking Time: 20-25 minutes
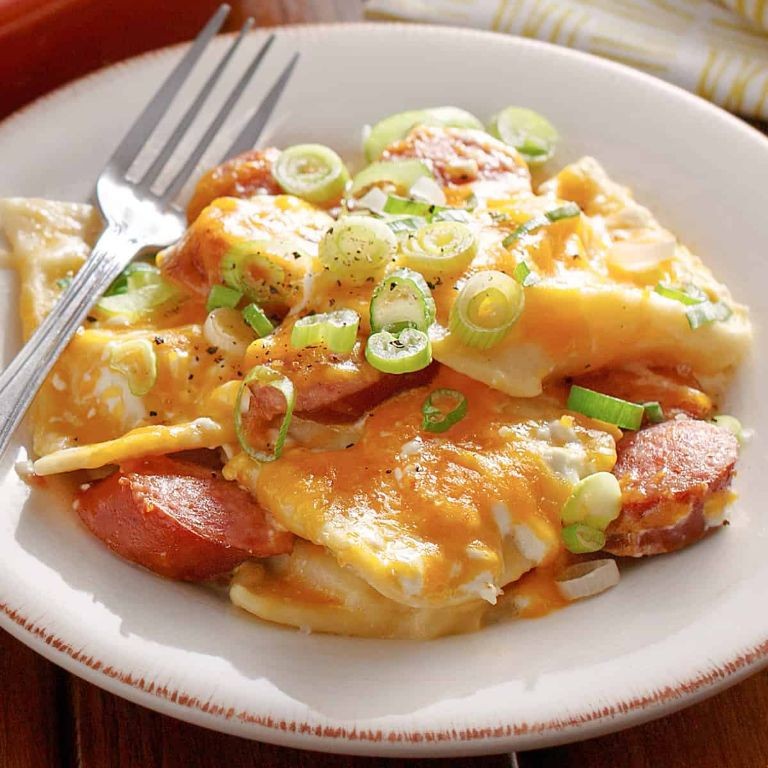
Slow Cooker Pierogi Casserole with Kielbasa

This hearty casserole combines the comforting flavors of pierogi and kielbasa, making it a perfect meal for a chilly evening. With minimal prep time and hands-off cooking, this slow cooker recipe is a weeknight winner.
Ingredients:
– 1 package of frozen pierogi (any variety)
– 1 pound of kielbasa sausage, sliced
– 1 onion, chopped
– 2 cloves of garlic, minced
– 1 cup of chicken broth
– 1/4 cup of sour cream
– 1 tablespoon of caraway seeds
– Salt and pepper to taste
– Chopped fresh parsley or chives for garnish (optional)
Instructions:
1. Cook the pierogi according to package instructions.
2. In a slow cooker, combine cooked pierogi, kielbasa, onion, garlic, chicken broth, sour cream, and caraway seeds.
3. Season with salt and pepper to taste.
4. Cook on low for 6-8 hours or high for 3-4 hours.
5. Serve hot, garnished with chopped parsley or chives if desired.
Cooking Time: 6-8 hours (low) or 3-4 hours (high)
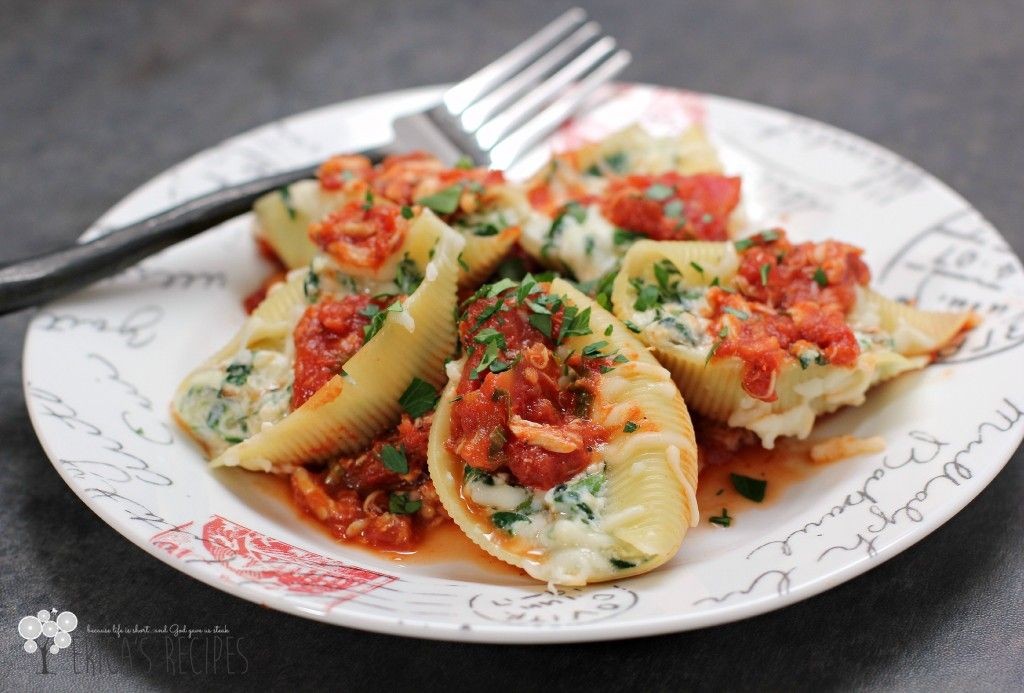
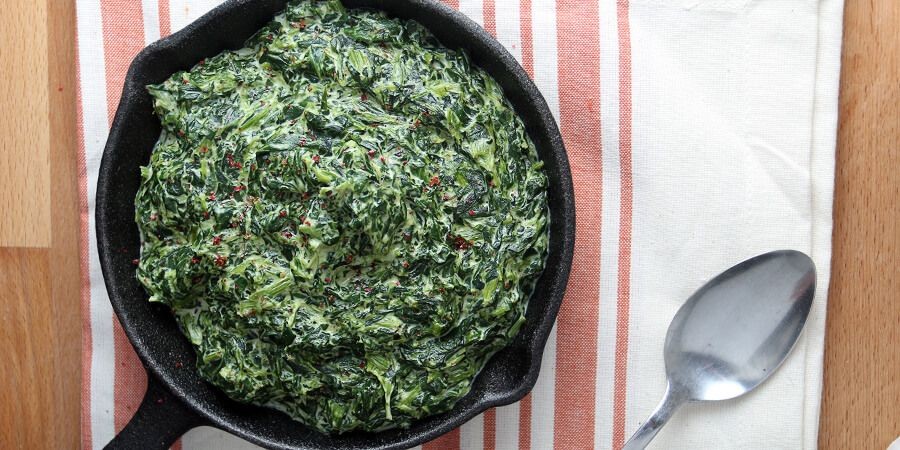
Spinach and Ricotta Pierogi Casserole
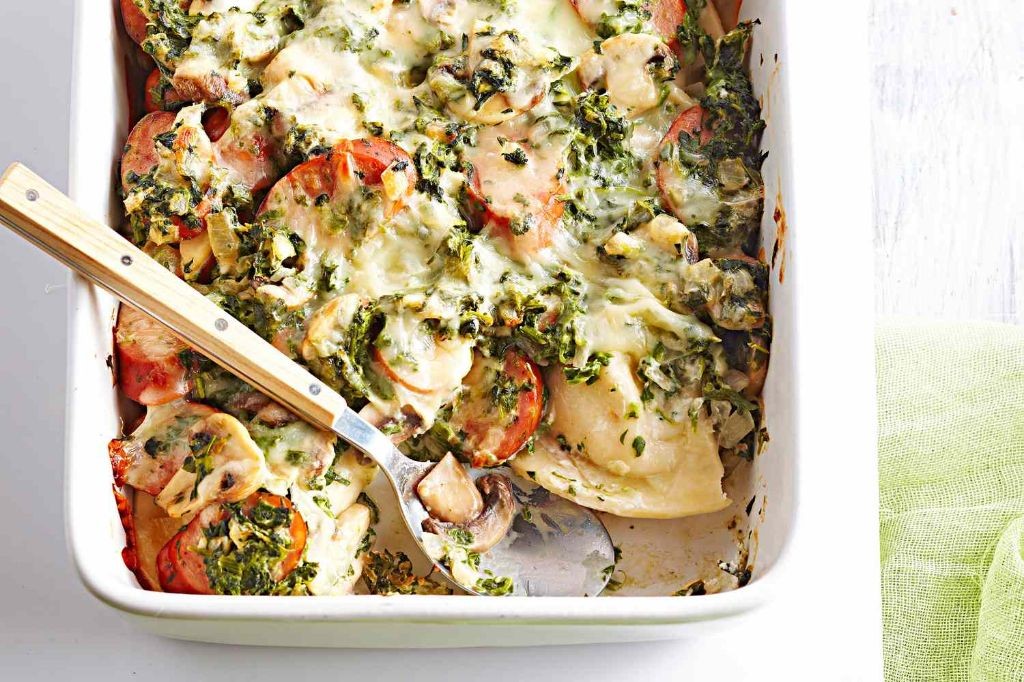
Elevate your comfort food game with this creamy, cheesy pierogi casserole filled with spinach and ricotta goodness. This satisfying dish is perfect for a cozy night in or as a show-stopping main course.
Ingredients:
– 1 package of frozen pierogi (spinach and cheese-filled)
– 2 cups of shredded mozzarella cheese
– 1 cup of shredded cheddar cheese
– 1/4 cup of grated Parmesan cheese
– 1 tablespoon of unsalted butter, melted
– Salt and pepper to taste
Instructions:
1. Preheat oven to 375°F (190°C).
2. Cook the pierogi according to package instructions.
3. In a large skillet, combine mozzarella, cheddar, and Parmesan cheese. Stir until melted and smooth.
4. Add the cooked pierogi to the cheesy mixture and stir until well coated.
5. Transfer the pierogi mixture to a 9×13-inch baking dish. Dot with melted butter.
6. Bake for 20-25 minutes or until golden brown and bubbly.
Cooking Time: 20-25 minutes
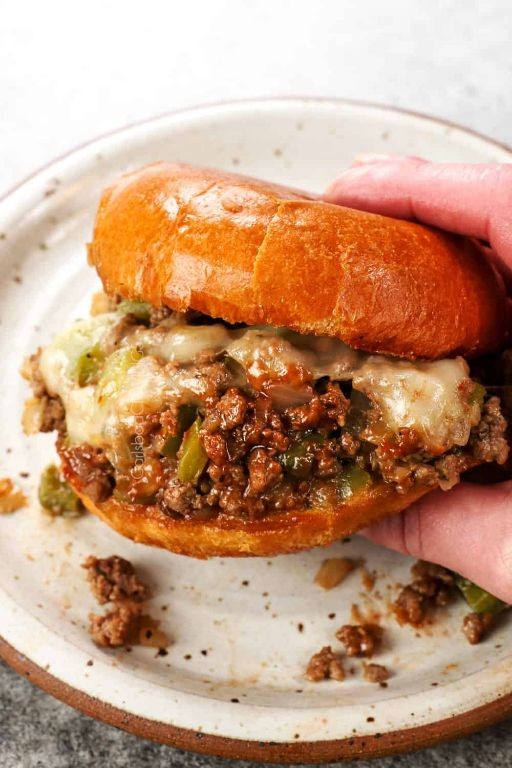
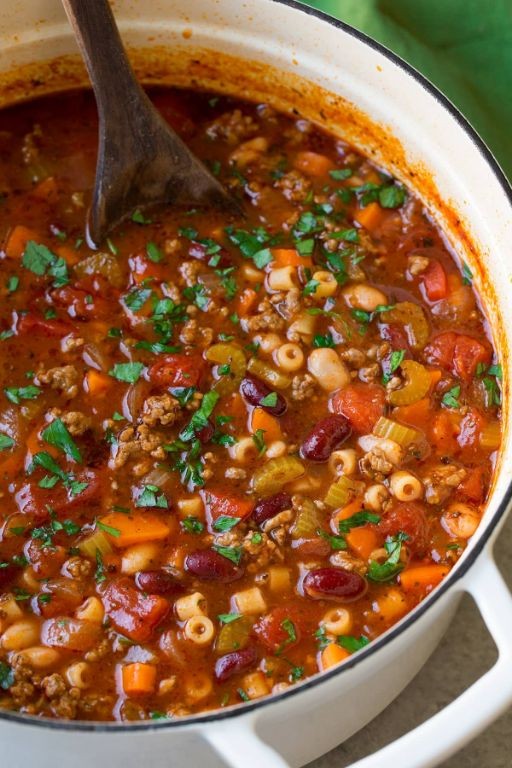
Pierogi Lasagna with Ground Beef and Mushrooms
Pierogi Lasagna with Ground Beef and Mushrooms: A hearty twist on the classic Italian dish, this recipe combines the comfort of pierogi with the flavors of lasagna.
Ingredients:
– 12-15 pierogi noodles (homemade or store-bought)
– 1 lb ground beef
– 1 onion, finely chopped
– 2 cups mixed mushrooms (button, cremini, shiitake), sliced
– 1 cup marinara sauce
– 1 cup shredded mozzarella cheese
– 1/4 cup grated Parmesan cheese
– Salt and pepper to taste
– Fresh parsley, chopped (optional)
Instructions:
1. Preheat oven to 375°F.
2. Cook pierogi noodles according to package instructions or homemade recipe. Drain and set aside.
3. In a large skillet, cook ground beef over medium-high heat until browned, breaking into small pieces as it cooks.
4. Add chopped onion and sauté until translucent. Then add sliced mushrooms and cook until they release their moisture and start to brown.
5. Stir in marinara sauce and bring to a simmer. Season with salt and pepper to taste.
6. In a 9×13-inch baking dish, create a layer of pierogi noodles. Top with ground beef mixture, followed by shredded mozzarella cheese.
7. Repeat layers two more times, finishing with a layer of cheese on top.
8. Bake for 25-30 minutes or until cheese is melted and bubbly.
9. Sprinkle Parmesan cheese on top and serve hot, garnished with chopped parsley if desired.
Cooking Time: 25-30 minutes
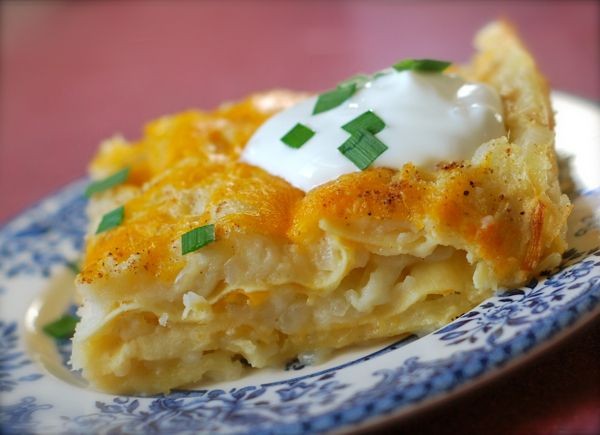
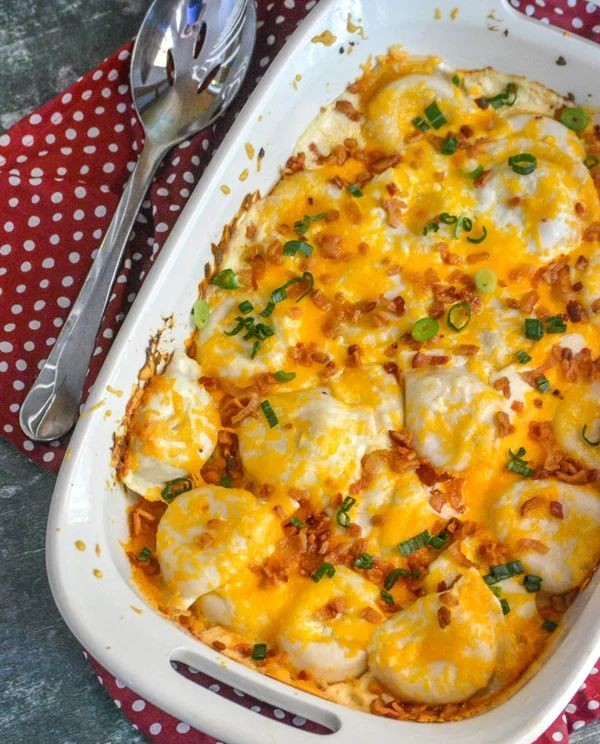
Loaded Pierogi Casserole with Sour Cream and Chives

Loaded Pierogi Casserole with Sour Cream and Chives: A Twist on a Classic Comfort Food!
This hearty casserole combines the flavors of loaded pierogies with the creaminess of sour cream and the oniony goodness of chives. Perfect for a cozy night in or a family gathering.
Ingredients:
– 1 package of frozen pierogi (any variety)
– 1 cup sour cream
– 2 tablespoons butter, softened
– 1/4 cup chopped fresh chives
– 1 cup shredded cheddar cheese
– 1/2 cup diced cooked bacon (optional)
Instructions:
1. Preheat oven to 375°F.
2. Cook the pierogi according to package instructions; drain and set aside.
3. In a large skillet, melt the butter over medium heat. Add the chopped chives and cook until fragrant, about 30 seconds.
4. Arrange half of the cooked pierogi in the bottom of a 9×13-inch baking dish.
5. Top with the sour cream mixture (sour cream, softened butter, and chopped chives). Sprinkle with shredded cheese and diced bacon (if using).
6. Repeat the layers, starting with the pierogi, then the sour cream mixture, and finally the remaining cheese.
7. Bake for 25-30 minutes or until golden brown.
Cooking Time: 25-30 minutes
Pierogi and Sauerkraut Casserole

Pierogi and Sauerkraut Casserole: A Hearty Twist on Traditional Polish Comfort Food
This recipe combines the classic flavors of pierogi with the tanginess of sauerkraut, wrapped up in a cozy casserole. Perfect for a chilly evening or special occasion.
Ingredients:
– 1 package of frozen pierogi (cherry or potato filling)
– 1 cup of sauerkraut, drained
– 2 tablespoons of butter
– 1 onion, finely chopped
– 1 teaspoon of caraway seeds
– 1/2 cup of grated cheddar cheese
– Salt and pepper to taste
Instructions:
1. Preheat oven to 375°F (190°C).
2. Cook pierogi according to package instructions.
3. In a large skillet, melt butter over medium heat. Add chopped onion and cook until translucent.
4. Stir in sauerkraut and caraway seeds. Cook for 2-3 minutes or until heated through.
5. In a greased 9×13-inch baking dish, arrange cooked pierogi in a single layer.
6. Pour the sauerkraut mixture over the pierogi, followed by sprinkling cheddar cheese on top.
7. Bake for 20-25 minutes or until golden brown and bubbly.
Cooking Time: 20-25 minutes
Buffalo Chicken Pierogi Casserole
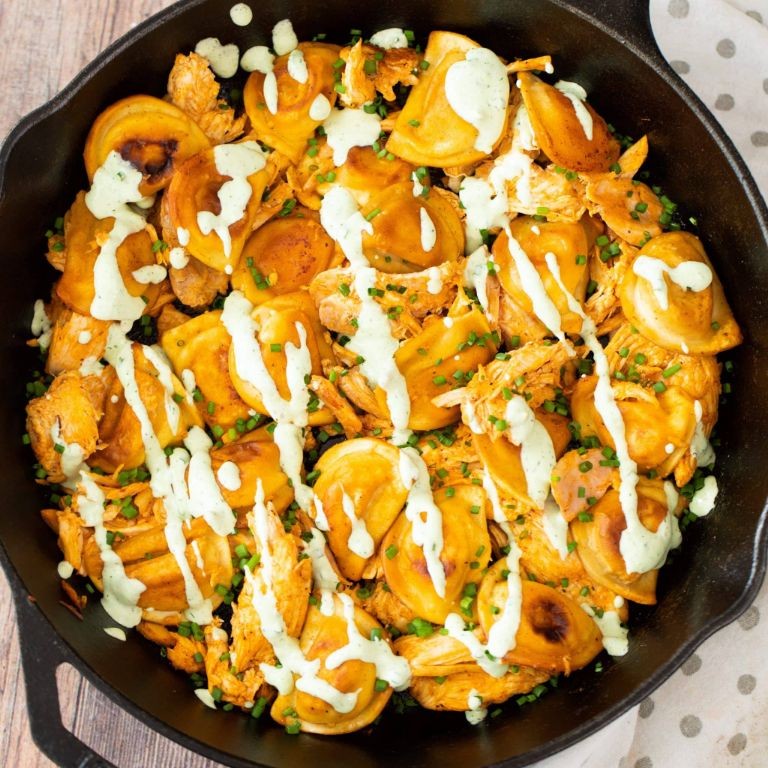
A twist on traditional pierogi, this casserole combines the flavors of Buffalo chicken with the comforting warmth of a hearty dish. Perfect for a cold winter’s night or a game-day gathering.
Ingredients:
– 1 (12-ounce) package of frozen pierogi
– 1 pound cooked chicken, shredded
– 1/2 cup buffalo wing sauce
– 1/4 cup ranch dressing
– 1 cup shredded cheddar cheese
– 1/2 cup crumbled blue cheese
– 1/4 cup chopped green onions
– 1 tablespoon butter
Instructions:
1. Preheat oven to 375°F.
2. Cook pierogi according to package instructions and set aside.
3. In a large skillet, combine chicken, buffalo wing sauce, and ranch dressing. Heat over medium heat until warmed through.
4. In a separate bowl, mix together cheddar cheese, blue cheese, and green onions.
5. In a 9×13-inch baking dish, arrange half of the cooked pierogi. Top with the chicken mixture, then sprinkle with the cheese mixture. Repeat layers.
6. Dot the top with butter and bake for 25-30 minutes or until golden brown.
Cooking Time: 25-30 minutes
Pierogi Casserole with Caramelized Onions and Gruyere

Pierogi Casserole with Caramelized Onions and Gruyere: A Twist on the Classic Polish Dish
This casserole combines the traditional Polish dumpling, pierogi, with sweet caramelized onions and nutty Gruyère cheese for a rich and satisfying meal.
Ingredients:
– 1 package of frozen pierogi (any filling)
– 1 large onion, thinly sliced
– 2 tablespoons unsalted butter
– 1/4 cup dry white wine (optional)
– 1 cup grated Gruyère cheese
– 1/2 cup heavy cream
– Salt and pepper to taste
Instructions:
1. Preheat oven to 375°F.
2. Caramelize the onions by cooking them in butter over medium-low heat for 20-25 minutes, stirring occasionally. Add white wine (if using) during the last 5 minutes of cooking.
3. Cook the pierogi according to package instructions and set aside.
4. In a large mixing bowl, combine cooked pierogi, caramelized onions, Gruyère cheese, and heavy cream. Season with salt and pepper to taste.
5. Transfer the mixture to a 9×13 inch baking dish and bake for 25-30 minutes or until golden brown.
Cooking Time: 45-50 minutes
Pierogi Shepherd’s Pie Casserole

Elevate your comfort food game with this creative take on shepherd’s pie, incorporating the flavors of Poland with pierogi dumplings. This hearty casserole is perfect for a cozy night in.
Ingredients:
– 1 package of frozen pierogi (potato and cheese or any other flavor of your choice)
– 1 pound ground beef
– 1 onion, diced
– 2 cloves garlic, minced
– 1 cup frozen peas and carrots
– 1 cup beef broth
– 2 tablespoons tomato paste
– 2 tablespoons butter
– 1 cup mashed potatoes
– Salt and pepper to taste
Instructions:
1. Preheat oven to 375°F (190°C).
2. Brown the ground beef in a large skillet, then add onion, garlic, peas and carrots, beef broth, and tomato paste. Simmer until heated through.
3. Arrange pierogi in the bottom of a 9×13 inch baking dish.
4. Pour the meat mixture over the pierogi.
5. Top with mashed potatoes and dot with butter.
6. Bake for 25-30 minutes or until the potatoes are golden brown.
Cooking Time: 30 minutes
Pierogi Casserole with Kielbasa and Peppers
This hearty casserole combines the comforting flavors of pierogies, kielbasa, and roasted peppers for a satisfying twist on traditional Polish cuisine. Perfect for a cozy dinner or potluck gathering.
Ingredients:
– 1 package of frozen pierogies (cheese or potato)
– 1 pound kielbasa sausage, sliced
– 2 large bell peppers, sliced
– 1 onion, thinly sliced
– 2 cloves garlic, minced
– 1 cup shredded cheddar cheese
– 1/4 cup chopped fresh parsley
– Salt and pepper to taste
Instructions:
1. Preheat oven to 375°F (190°C).
2. Cook pierogies according to package instructions.
3. In a large skillet, sauté kielbasa, bell peppers, onion, and garlic until the vegetables are tender.
4. Combine cooked pierogies, sausage mixture, and shredded cheese in a 9×13-inch baking dish.
5. Sprinkle with chopped parsley and season with salt and pepper to taste.
6. Bake for 25-30 minutes or until the casserole is golden brown and bubbly.
Cooking Time: 25-30 minutes
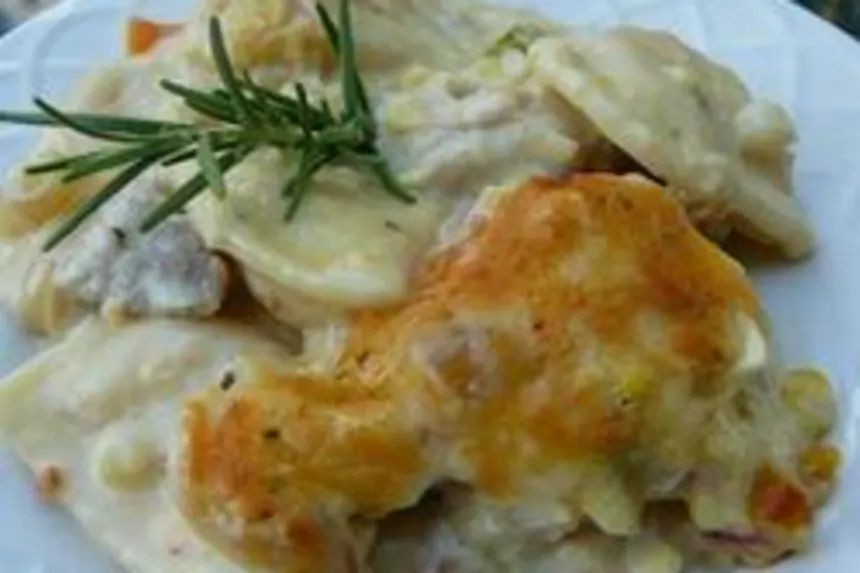
Pierogi Casserole with Creamy Garlic Sauce

This hearty casserole combines the comfort of homemade pierogies with a rich and creamy garlic sauce, perfect for a cozy night in.
Ingredients:
– 1 package of frozen pierogies (cheese or potato filling)
– 2 tablespoons butter
– 1 medium onion, diced
– 3 cloves garlic, minced
– 1 cup heavy cream
– 1 cup shredded cheddar cheese
– Salt and pepper to taste
– Fresh parsley, chopped (optional)
Instructions:
1. Preheat oven to 375°F.
2. Butter a 9×13-inch baking dish.
3. Arrange the pierogies in the prepared dish.
4. In a large skillet, sauté the onion and garlic until softened.
5. Pour in the heavy cream and bring to a simmer.
6. Stir in the shredded cheese until melted and smooth.
7. Pour the creamy garlic sauce over the pierogies.
8. Sprinkle with salt and pepper to taste.
9. Bake for 25-30 minutes, or until the casserole is golden brown.
10. Garnish with chopped parsley, if desired.
Cooking Time: 25-30 minutes
Pierogi Casserole with Roasted Brussels Sprouts
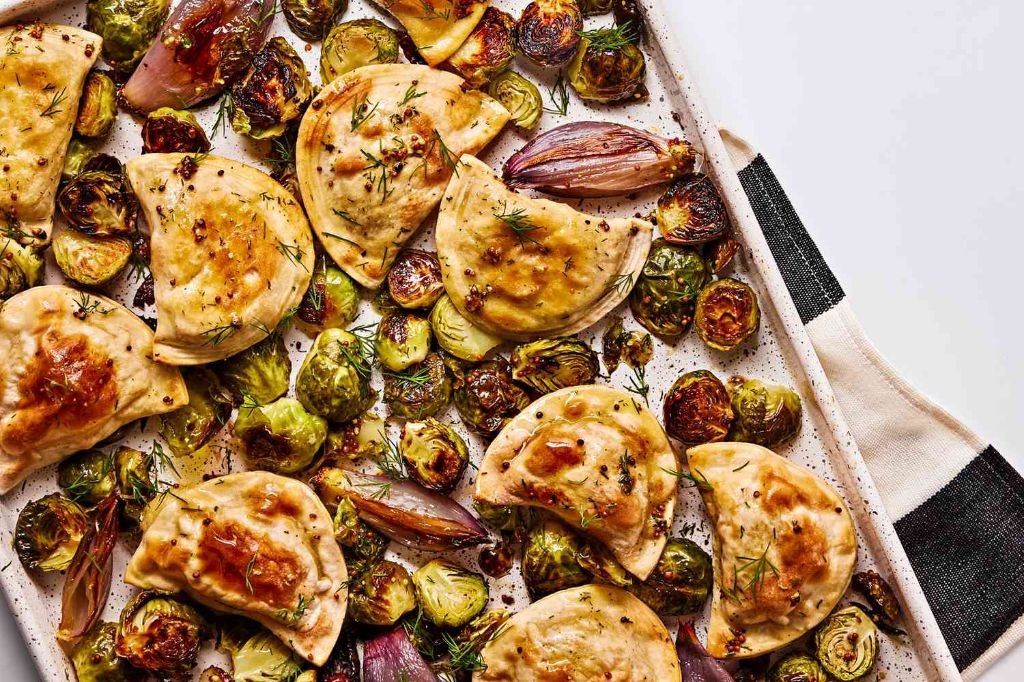
Pierogi Casserole with Roasted Brussels Sprouts: A Twist on a Classic Comfort Food
This hearty casserole combines the flavors of traditional Polish pierogi with the earthy sweetness of roasted Brussels sprouts. It’s a perfect dish for a chilly fall or winter evening.
Ingredients:
– 1 package of frozen pierogi (potato and cheese filling)
– 2 tablespoons butter
– 1 medium onion, chopped
– 2 cups Brussels sprouts, trimmed and halved
– 1/4 cup brown sugar
– Salt and pepper to taste
– 1 cup shredded cheddar cheese
Instructions:
1. Preheat oven to 375°F (190°C).
2. Cook pierogi according to package instructions; set aside.
3. In a large skillet, melt butter over medium heat. Add chopped onion and cook until translucent, about 5 minutes.
4. Add Brussels sprouts, brown sugar, salt, and pepper to the skillet. Roast for 20-25 minutes or until tender and caramelized.
5. In a separate baking dish, arrange cooked pierogi in an even layer.
6. Top with roasted Brussels sprouts mixture and sprinkle with shredded cheddar cheese.
7. Bake for 15-20 minutes or until cheese is melted and bubbly.
Cooking Time: 45-50 minutes
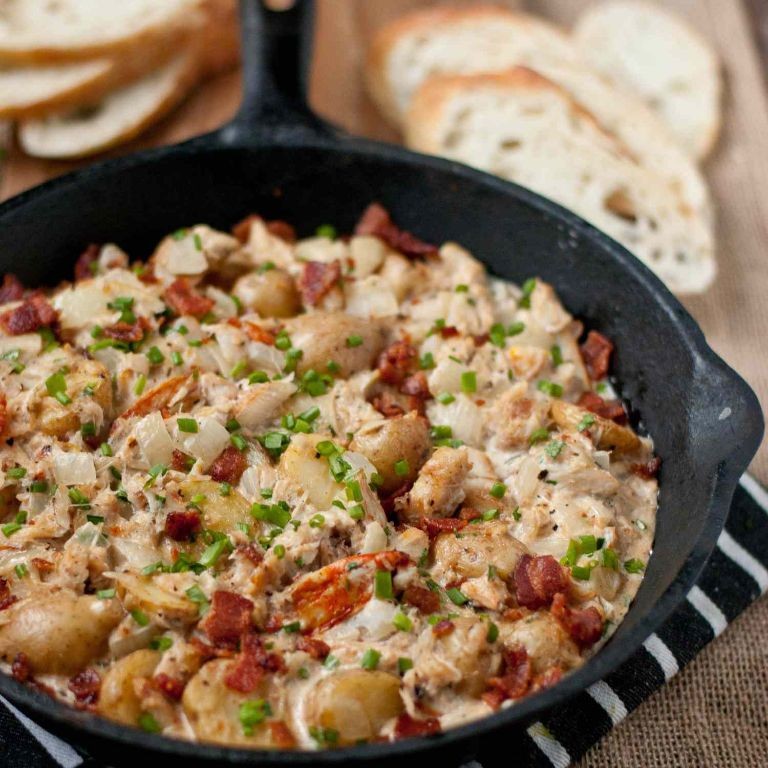
Pierogi Casserole with Smoked Gouda and Bacon

Elevate your pierogi game with this creamy, smoky casserole featuring smoked gouda and crispy bacon. This comforting dish is perfect for a chilly evening or a special occasion.
Ingredients:
– 1 package of frozen pierogi (potato and cheese work well)
– 1 cup smoked Gouda cheese, shredded
– 6 slices of thick-cut bacon, cooked and crumbled
– 1/4 cup unsalted butter, softened
– 1/2 cup heavy cream
– Salt and pepper to taste
Instructions:
1. Preheat oven to 375°F (190°C).
2. Cook the pierogi according to package instructions.
3. In a large skillet, melt the butter over medium heat. Add the crumbled bacon and cook until crispy.
4. In a separate bowl, mix the smoked Gouda cheese with the heavy cream.
5. In a 9×13-inch baking dish, arrange half of the cooked pierogi in an even layer. Top with the bacon mixture, then pour the Gouda-cream mixture over the top.
6. Repeat the layers, finishing with a layer of pierogi on top.
7. Bake for 25-30 minutes or until the casserole is golden brown and bubbly.
Cooking Time: 25-30 minutes
Pierogi Casserole with Mushroom Gravy
A comforting twist on traditional pierogies, this casserole combines the classic Polish dish with a rich and savory mushroom gravy. Perfect for a cozy night in or a special occasion.
Ingredients:
– 1 (16 oz) package of frozen pierogies
– 2 tablespoons butter
– 1 medium onion, finely chopped
– 2 cups mixed mushrooms (button, cremini, shiitake), sliced
– 1 cup beef broth
– 1/2 cup heavy cream
– Salt and pepper to taste
– 1 cup shredded cheddar cheese
Instructions:
1. Preheat oven to 350°F.
2. Cook pierogies according to package instructions. Drain and set aside.
3. In a large skillet, melt butter over medium heat. Add onion and cook until translucent, about 5 minutes.
4. Add mushrooms and cook until they release their liquid and start to brown, about 10 minutes.
5. Stir in beef broth and heavy cream. Bring to a simmer and cook for 2-3 minutes or until slightly thickened.
6. In a large mixing bowl, combine cooked pierogies, mushroom gravy, and shredded cheese. Mix well to combine.
7. Transfer the mixture to a 9×13 inch baking dish and top with additional cheese if desired.
8. Bake for 25-30 minutes or until golden brown and bubbly.
Cooking Time: 30-35 minutes
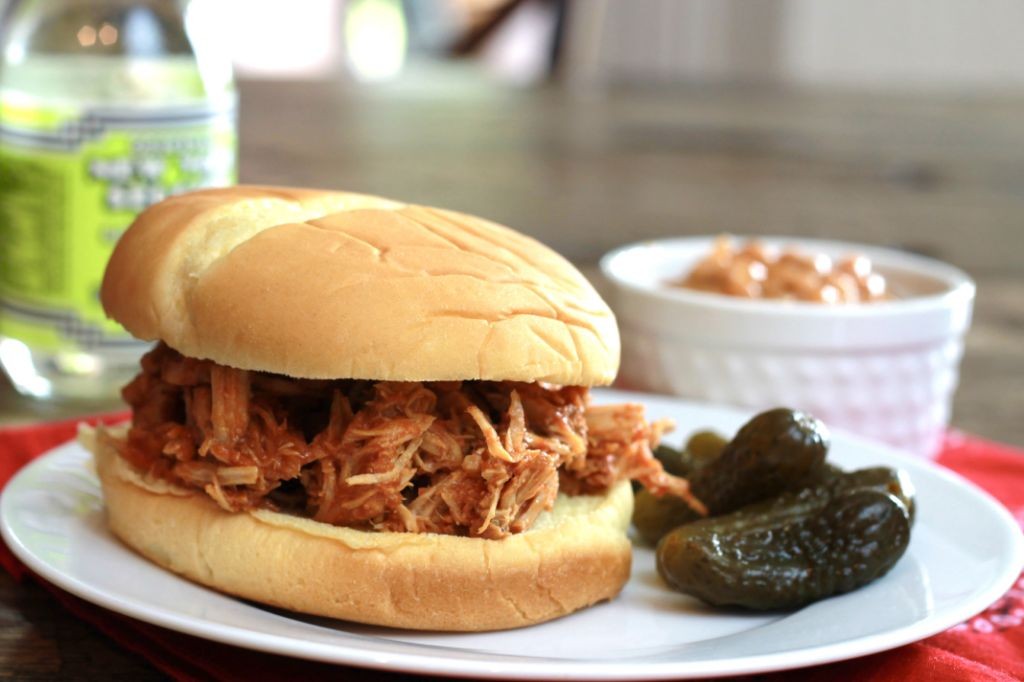
Pierogi Casserole with Pulled Pork and BBQ Sauce
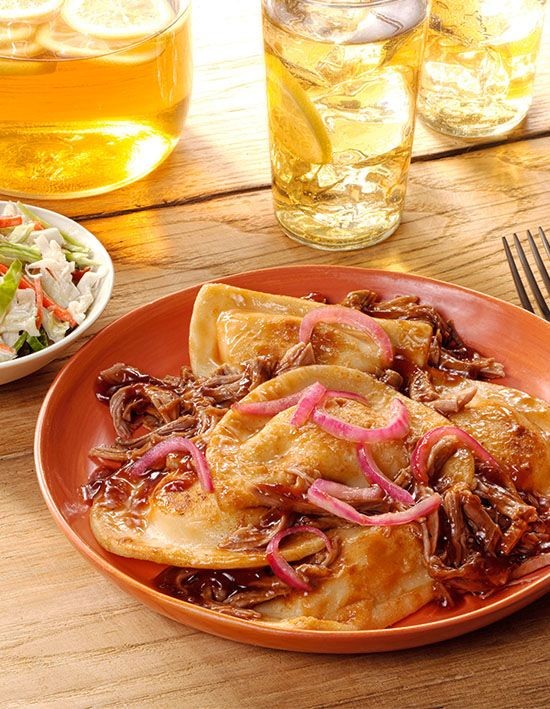
Pierogi Casserole with Pulled Pork and BBQ Sauce: A Twist on a Classic Comfort Food
This casserole combines the flavors of tender pulled pork, tangy BBQ sauce, and pillowy pierogies for a delightful twist on traditional comfort food.
Ingredients:
- 1 package of frozen pierogies (potato and cheese or cheddar work well)
- 2 cups of shredded pulled pork
- 1 cup of BBQ sauce
- 1 tablespoon of olive oil
- Salt and pepper to taste
- Cheese (optional) for topping
Instructions:
- Preheat the oven to 375°F (190°C).
- In a large skillet, heat the olive oil over medium-high heat. Add the pulled pork and BBQ sauce; stir until well combined.
- In a separate baking dish, arrange half of the pierogies in a single layer.
- Top with the pulled pork mixture, followed by the remaining pierogies.
- Bake for 25-30 minutes or until the casserole is hot and bubbly. If desired, sprinkle shredded cheese on top during the last 5 minutes of cooking.
Cooking Time: 25-30 minutes
Pierogi Casserole with Spinach and Feta

This hearty casserole combines the flavors of traditional pierogi with the creamy goodness of spinach and feta cheese. Perfect for a cozy night in or a special occasion.
Ingredients:
– 1 package of frozen pierogi (cheese-filled)
– 1 bunch of fresh spinach, chopped
– 1/2 cup crumbled feta cheese
– 1 onion, diced
– 2 cloves of garlic, minced
– 1 cup grated cheddar cheese
– 1/4 cup unsalted butter, melted
– Salt and pepper to taste
Instructions:
1. Preheat oven to 375°F (190°C).
2. Cook pierogi according to package instructions.
3. In a large skillet, sauté onion and garlic until softened. Add chopped spinach and cook until wilted.
4. In a separate bowl, combine cooked pierogi, spinach mixture, and crumbled feta cheese.
5. Transfer the mixture to a 9×13 inch baking dish. Top with grated cheddar cheese and melted butter.
6. Bake for 25-30 minutes or until cheese is golden brown.
Cooking Time: 25-30 minutes
Pierogi Casserole with Corned Beef and Swiss Cheese
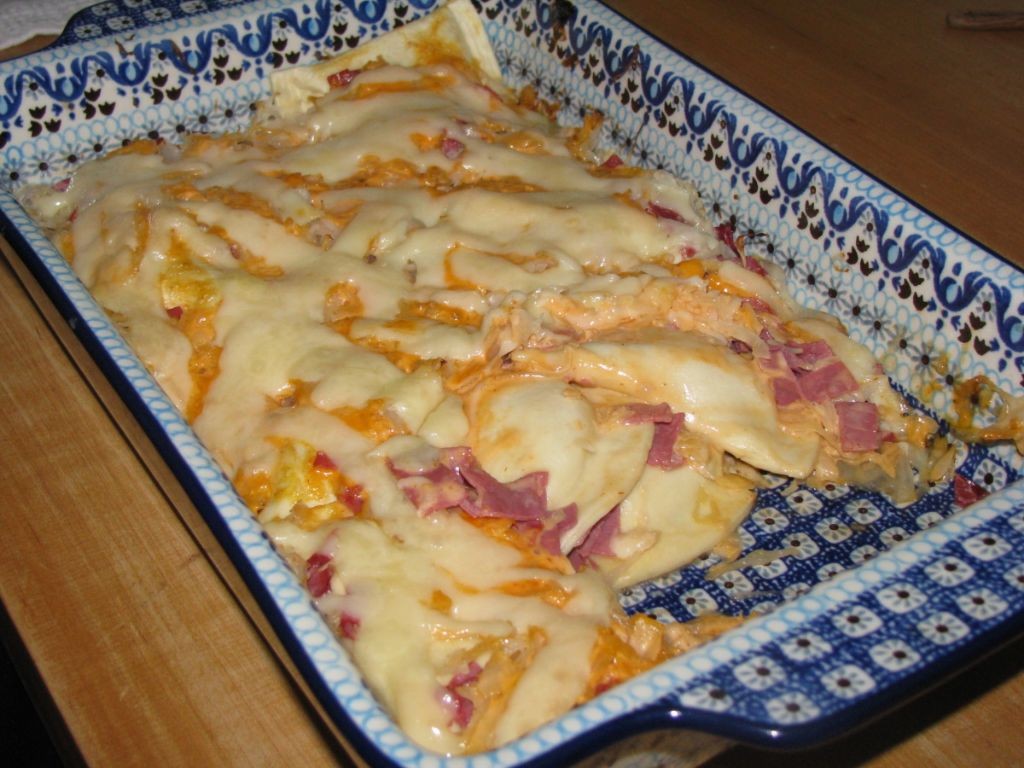
A hearty twist on the classic pierogi dish, this casserole combines tender corned beef, creamy Swiss cheese, and pillowy pierogi in a rich and satisfying one-dish meal.
Ingredients:
– 1 package of frozen pierogi (cheese-filled or your preferred filling)
– 1 pound corned beef, sliced
– 2 tablespoons butter
– 1 cup shredded Swiss cheese
– 1/4 cup chopped fresh parsley
– Salt and pepper to taste
Instructions:
1. Preheat oven to 350°F.
2. In a large skillet, sauté the sliced corned beef until tender, about 5 minutes.
3. Arrange half of the pierogi in the bottom of a 9×13-inch baking dish.
4. Top with the cooked corned beef, then sprinkle with Swiss cheese and parsley.
5. Repeat the layers, starting with the remaining pierogi, then corned beef, and finally another layer of Swiss cheese and parsley.
6. Dot the top with butter and season with salt and pepper to taste.
7. Bake for 30-35 minutes or until the cheese is melted and bubbly.
Cooking Time: 30-35 minutes
Pierogi Casserole with Sausage and Peppers

This hearty casserole combines the comfort of Polish pierogies with the flavors of sausage and bell peppers. A perfect one-pot meal for a chilly evening!
Ingredients:
– 1 package of frozen pierogies (about 20-25 count)
– 1 lb sweet Italian sausage, casings removed
– 2 large bell peppers, sliced
– 1 medium onion, chopped
– 1 can of condensed cream of mushroom soup
– 1 cup shredded cheddar cheese
– Salt and pepper to taste
Instructions:
1. Preheat oven to 375°F.
2. Cook sausage in a large skillet over medium-high heat, breaking it up with a spoon as it cooks.
3. Add bell peppers and onion to the skillet; cook until vegetables are tender.
4. Arrange half of the pierogies in the bottom of a 9×13-inch baking dish.
5. Pour cooked sausage mixture over the pierogies, followed by the cream of mushroom soup.
6. Top with remaining pierogies and sprinkle with cheddar cheese.
7. Bake for 30-35 minutes or until the casserole is hot and bubbly.
Cooking Time: 30-35 minutes
Pierogi Casserole with Butternut Squash and Sage
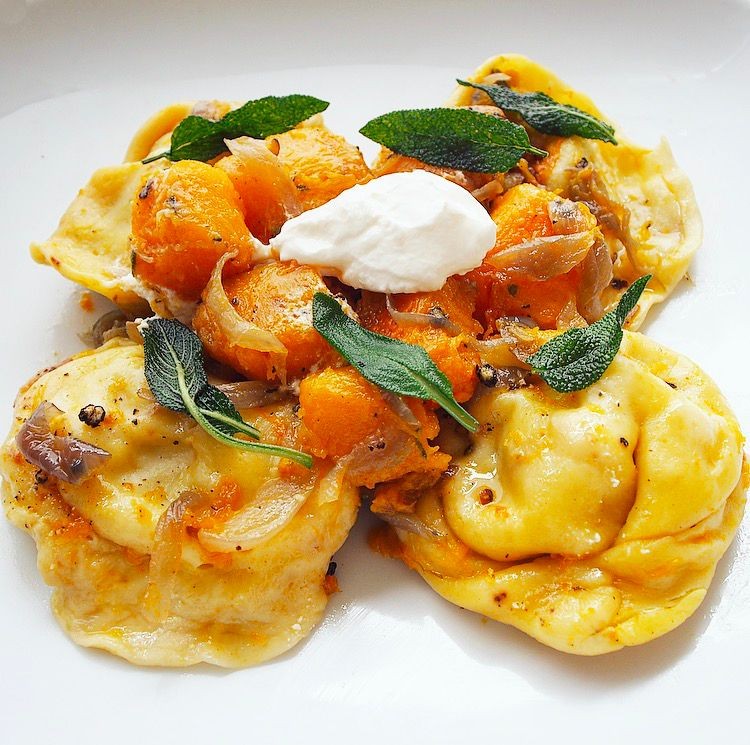
This hearty casserole combines the comforting flavors of pierogi, butternut squash, and sage for a cozy twist on traditional Polish comfort food. With its creamy sauce and crispy top layer, it’s sure to become a new family favorite.
Ingredients:
– 12-16 pierogi (homemade or store-bought)
– 1 medium butternut squash, cooked and mashed
– 2 tablespoons unsalted butter
– 1 small onion, finely chopped
– 3 cloves garlic, minced
– 1 teaspoon dried sage
– 1 cup grated cheddar cheese
– 1/4 cup heavy cream
– Salt and pepper to taste
Instructions:
1. Preheat oven to 375°F (190°C).
2. In a large skillet, sauté the onion and garlic until softened.
3. Add the mashed butternut squash, butter, sage, salt, and pepper. Stir until combined.
4. Arrange the pierogi in a single layer in a 9×13-inch baking dish.
5. Pour the squash mixture over the pierogi, followed by the cheddar cheese.
6. Dot the top with heavy cream.
7. Bake for 25-30 minutes or until golden brown and bubbly.
Summary
Get ready to cozy up with these 20 creamy pierogi casserole recipes! From classic potato and onion to loaded sour cream and chives, there’s something for every comfort food lover. Try our cheesy potato and onion pierogi casserole, bacon and cheddar pierogi bake, or slow cooker pierogi casserole with kielbasa. You’ll also find spinach and ricotta, pierogi lasagna, and many more mouth-watering options. Whether you’re in the mood for something classic or adventurous, these creamy pierogi casseroles are sure to become a new family favorite.